THE INNOVATIVE SYSTEM THAT ALLOWS YOU TO REPOSITION ANY 3D PRINTED MODEL IN YOUR TRADITIONAL ARTICULATOR USING A MAGNET-BASED SYSTEM.
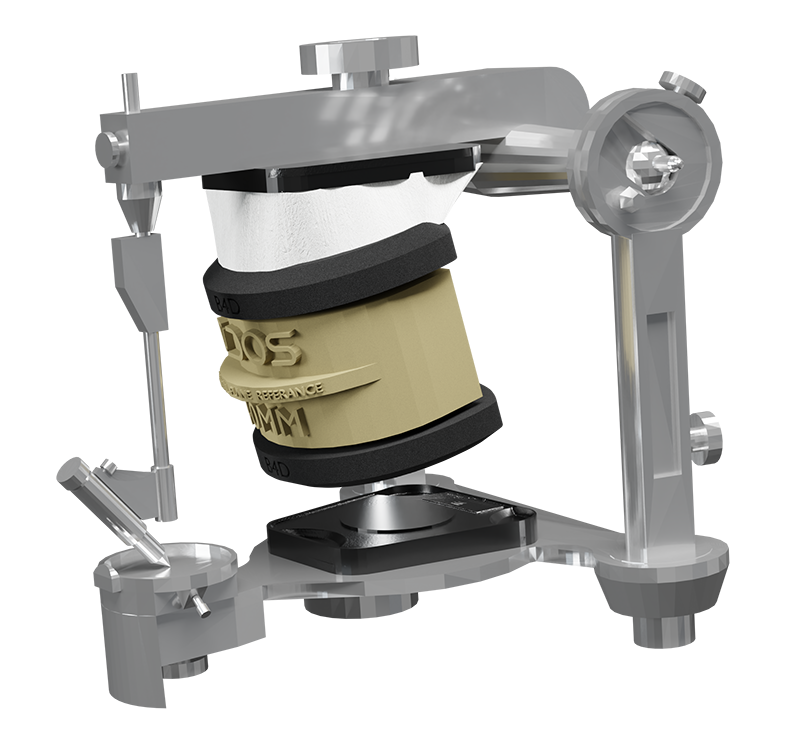
Developed in collaboration with Blender For Dental e Metadac
Conceived with Antonello Croce, this project combines the expertise of leading companies in digital dentistry to bring you a truly innovative solution.
The DACOS system consists of a software part that can be purchased and downloaded from the site Blender for Dental and a hardware part that can be purchased on the Ruthinium online shop
The software component was developed and will be marketed by industry leader Blender For Dental®. The software, once purchased, can be installed on 3 different locations.
Please note that this module does not include the base plate and articulation system. These must be purchased through the Ruthinium shop.
Ruthinium is responsible for distribution of the DACOS KIT through its e-commerce platform and distribution network. Each DACOS kit will include a QR code that will direct users to the Blender For Dental website to purchase the software module.
Please note that the DACOS Full Kit does not include in software module. This must be purchased through the Blender for Dental shop.
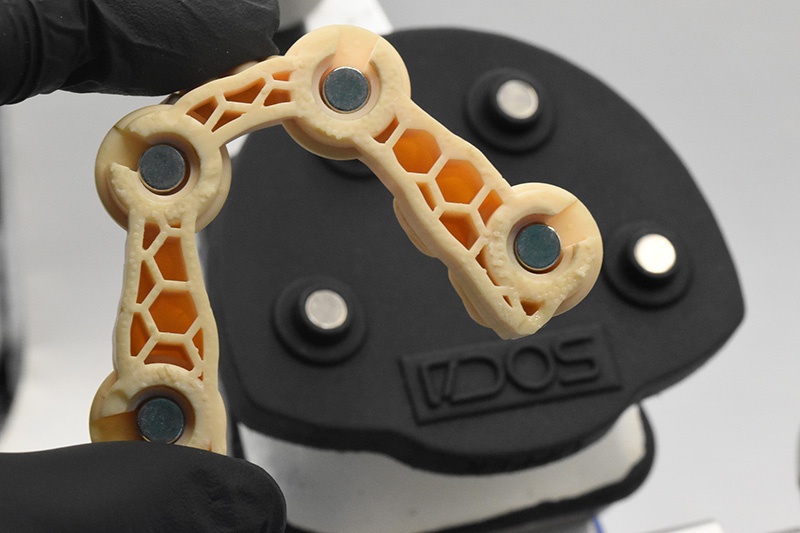

The operation of DACOS is based on the innovative use of the DACOS Module and the DACOS Plate.
This system allows a 3D printed model to be generated with specific attachments into which magnets will be inserted, allowing the model to easily and securely attach to the articulator.
THE ADVANTAGES OF DACOS
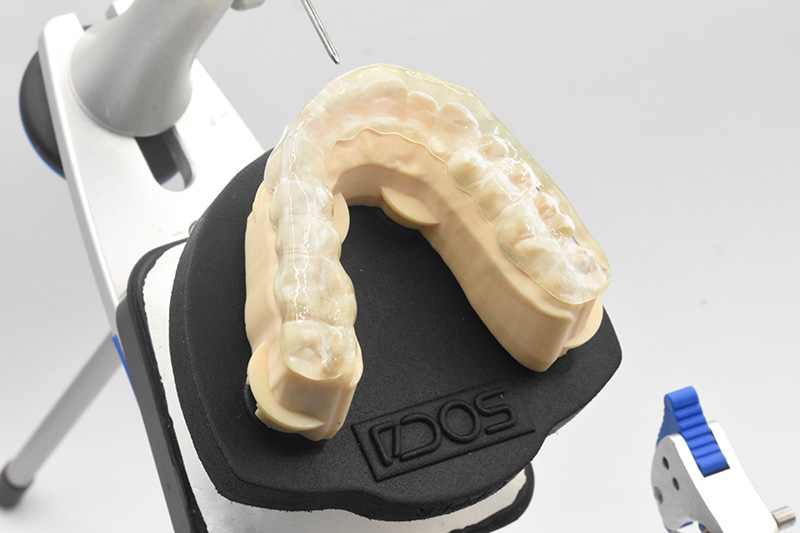

Universal application
Compatible with all articulators. Install it once with a cast and you will benefit for a lifetime.
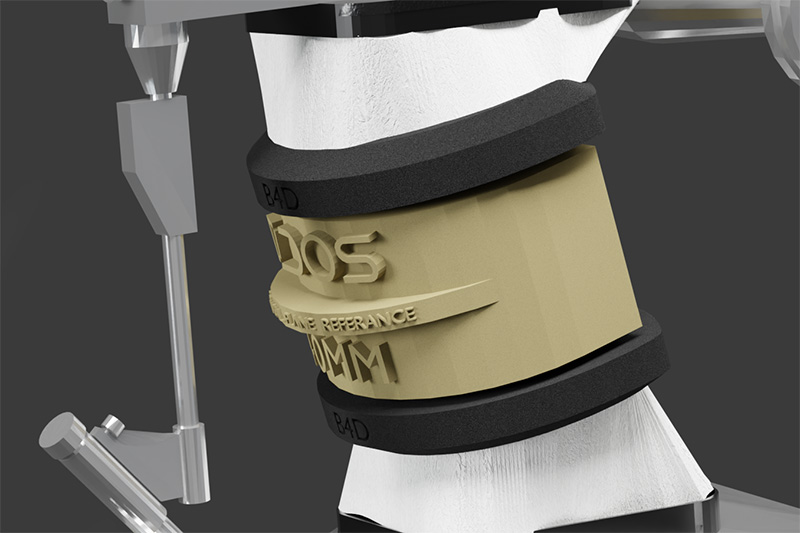

Integrated calibration
Thanks to self-installation, the first time DACOS is installed, it automatically adapts to the specific settings of the articulator.
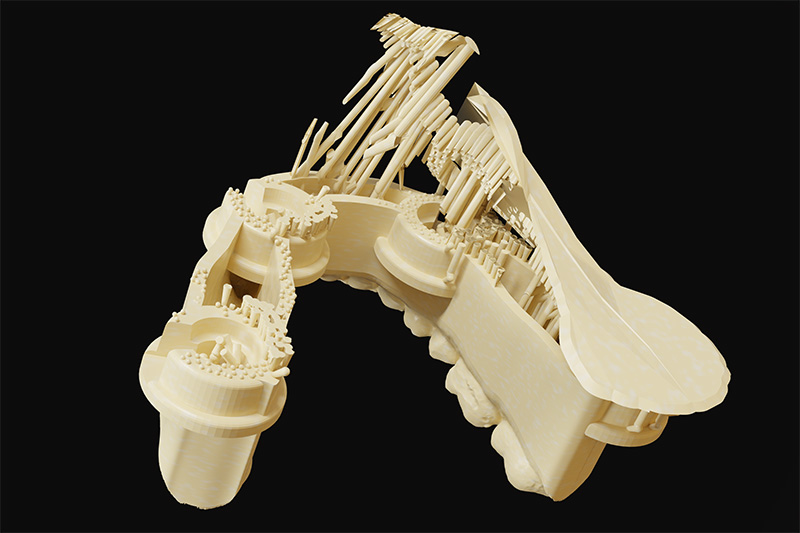

Designed for printing
Meticulously designed to integrate seamlessly with Nesting 3D printing.
ALL READY IN ONE CLICK!
1.
Install
To begin, install the DACOS plate in the articulator using the correct calibrator (40mm or 60mm) from the DACOS kit. This unique installation ensures compatibility with any articulator and provides long-term accuracy without the need for recalibration. Once installed, you are ready to go!
2.
Transform
Transform your existing models from software such as Exocad or 3Shape into DACOS-ready models using the DACOS module in Blender For Dental. Simply select the model, then click "Finish Upper" or "Finish Lower" to complete the process. In just a few clicks, models are ready to be exported and printed.
3.
Print your models with your favorite 3D printing system. No need to worry about supports-just place your models horizontally and click Auto Nesting. Once printed, use the GlueJet tool to insert the magnet into the model and you will be ready to articulate it with your chosen articulator!
FAQ
Can I place supports under the model when using DACOS?
Absolutely, and it is recommended to do so. The DACOS system has been meticulously designed to integrate seamlessly with 3D printing processes, including those using media. A distinctive advantage of DACOS is its ability to smoothly adapt to dimensional variations that can occur along the Z axis during 3D printing.
How to do it if I don't use Blender?
In addition to purchasing the DACOS MODULE you will need to purchase the Blender for Dental MODEL DESIGNER at a cost of $79.00. Go to the Blender shop ->
If I put too much glue on the magnets, do I risk changing the final height position?
Thereʼs no need to worry! Weʼve already taken care of everything. You just have to make sure you apply the necessary amount of glue and glue the magnet with the GlueJet included in the kit. The part that will be in contact with the articulator is not the magnet itself, but a surface specifically designed to prevent any unwanted variation in the Z-position. This detail can be seen through the windows of the attachments, allowing you to check the alignment without interference.
Do my articulators need to be calibrated?
With DACOS, calibrating your articulators is no longer a concern. Thanks to the built-in auto-calibration system, the first time you install DACOS, it automatically adjusts to your articulator's specifications. This ensures that the installation is always accurate and correct, eliminating the need for calibration and calibration of your own articulators.
If I put the magnet in the wrong way?
Don't worry, we've thought of everything! Our GlueJet is designed to avoid just this kind of mistake. It's a tool that guides you step by step as you place the magnets, ensuring that they are always oriented correctly. The GlueJet reflects the exact position of the baseplate, so you simply follow the instructions to ensure that the magnet is positioned correctly in the model.
Can I use DACOS with Exocad and 3Shape?
Absolutely, DACOS is fully compatible with Exocad! To use it, you simply export models generated in Exocad and/or 3Shape while retaining the original spatial coordinates. Then import these models into the DACOS module and with one click, the models will be ready to be exported again and printed. DACOS facilitates integration with existing workflows, making the process smooth and seamless.
Can I use DACOS with a facial arch?
Absolutely. DACOS is designed to be the final element of the digital workflow. If you have used a digital facebow transfer system, you will have no problem transferring the data to the analog articulator. Simply import the models into the software with the digital coordinates acquired from the facebow system, and DACOS will ensure that the models perfectly replicate the recorded position. DACOS is the ideal tool for transforming digital data into accurate analog results, making the transition between the two worlds seamless.
How can I start working with DACOS?
Getting started with DACOS is easy and straightforward. Here's how you can start integrating this innovative system into your practice:
1. Visit the Blender For Dental website:
- Go to www.blenderfordental.com/shop to purchase the DACOS software module. This module is essential for preparing digital models with DACOS-specific functions.
- The software is designed to integrate seamlessly with existing CAD systems, allowing models to be imported, precisely positioned and finalized for printing with just a few clicks.
2. Purchase the DACOS KIT from Ruthinium:
- Go to Ruthinium's e-commerce platform https://shop.ruthinium.com/ to purchase the DACOS KIT. This kit includes all the necessary physical components, such as the DACOS plate, magnets, GlueJet, and other accessories needed for installation.
- Each DACOS KIT has a QR code that, when scanned, will send you back to the Blender For Dental website for any additional resources or to purchase the software module, if you have not already done so.
3. Follow the installation instructions:
- Both Blender For Dental and Ruthinium provide detailed instructions and tutorials to guide you through the installation process.
- Be sure to follow these instructions carefully for proper installation, which is critical for optimal system operation and accuracy.
4. Use training and assistance:
- Take advantage of the training materials and customer support offered by both companies. They are dedicated to helping you get the most out of DACOS.
- Ongoing support is available to answer any questions and help you integrate DACOS seamlessly into your workflow.
5. Begin to transform your practice:
- With the software and hardware components in place, you are ready to start using DACOS.
- Enjoy the benefits of increased accuracy and efficiency and the ease of transferring digital designs to analog articulators.


